Everybody loves the effect light trails have on urban photography. It can make any city or situation look magical.
Light trails in photography work by combining long shutter speeds with fast moving lights to capture the streams of light.
Beautiful, yes. Easy? Certainly not. It’s all about experimentation. You can choose different light sources, try different settings, or go to different locations, and you’ll always be surprised with the results.
Find Your Light Source
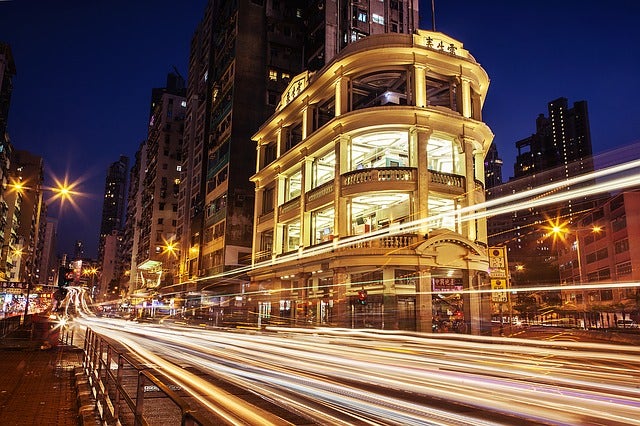
You can create a lot of effects using urban lighting, but arguably the most popular light trails are traffic trails, in which vehicles create light trails across a scene.
With light trails, the vehicles seem to disappear, leaving nothing but beautiful light trails travelling down usually busy roads.
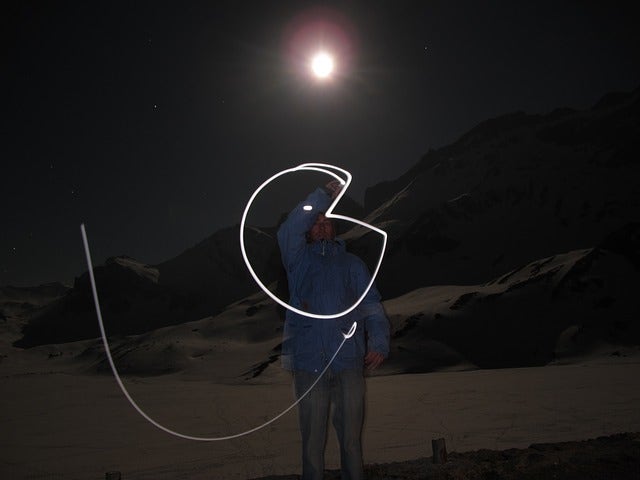
There are many other ways to make light trails. Torches can give you solid white lines. They have the added benefit of manipulation; you can use them to write a word or draw a picture.
For more colourful trails, use glow sticks. Have your friends dance and move with some glow sticks for an energetic photograph.
Sparklers are a cheap and effective tool, giving off a sparkling golden light trail. Or take advantage of New Year’s Eve fireworks for the same effect on a grander scale.
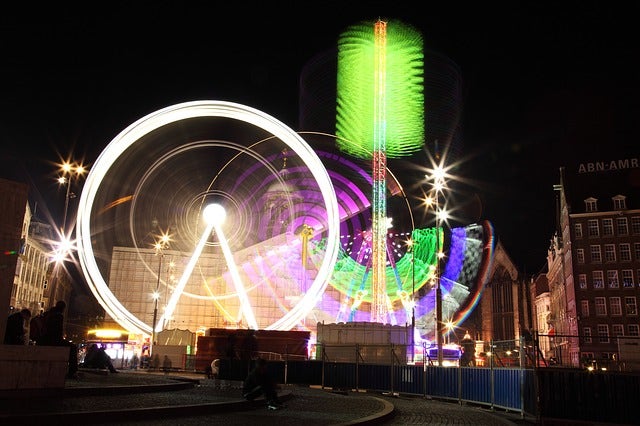
Finally, look for moving lights that will give you interesting shapes or patterns, like the Ferris wheel at the local fair.
Once you’ve found that ideal light source, it’s time to play with your camera settings. This is the tricky part because you need to get a clear shot using a slow shutter speed.
It can help to use the ambient light of dusk or a bright city night to set the scene and capture more background details. But you’ll still need to play with your camera settings to highlight light trails over other lights and create a crisp, clear shot without the noise.
Experimenting with Settings
You’ll find that each location has different ambient light and sources of moving light that will call for different settings.
Because of this, it’s difficult to list the exact settings you’ll need for light trail photography. You’ll only find the perfect settings with experimentation.
Before you get started, you’ll need to invest in a good tripod if you haven’t already. Like most night photography you’ll need to keep your camera as still as possible so that your image comes out crisp and clear.
Once you've got your tripod and your best quality camera, here are the other steps to capturing that perfect light trails photograph.
Step 1: Get the Right ISO
Simply put, the ISO setting adjusts your camera’s sensitivity to light. Using a high ISO setting in dark situations means you can take a photograph without using flash.
However, a high ISO can also create a lot more noise – or graininess – in your shot. So you’ll need to experiment to get the setting just right.
Start with a high ISO for your first shot. Then gradually lower the ISO until you find a good balance.
Step 2: Use Manual Focus
Next you’ll want to set the camera to manual focus mode. In dark settings, cameras can have trouble focusing. You don’t want your camera autofocusing as you hit the shutter button, thus ruining your shot.
The manual focus will give you more control of how the shot turns out. When photographing light trails, there’s no right or wrong way to time your shot. And there’s always room for trial and error.
Step 3: Experiment
Now it’s time to experiment. Play with your shutter speeds and ISO settings. The longer you want the light trail, the slower your shutter speed should be. Shutter speeds between 10 and 20 seconds usually offer the best results.
If your photo is overexposed, increase your f-stop number to close your aperture slightly. If it's too dark, widen your aperture by lowering your f-stop number.
It's often a good idea to shoot in RAW mode. Shooting in RAW will save your image exactly as your camera sensor saw it. It’s basically an unprocessed image.
This will give your more control over the image when you get to post-production work. You will be able to change things like white balance.
Capturing light trails is a great way to get to know your camera. It also makes for a wonderful night out. So get experimenting!
If you’re looking for more helpful tips, check out our other photography tips and advice on the Camera House blog. If you’re after the equipment to help expand your photography repertoire, visit us online or in store to check out our full range of camera products and accessories.