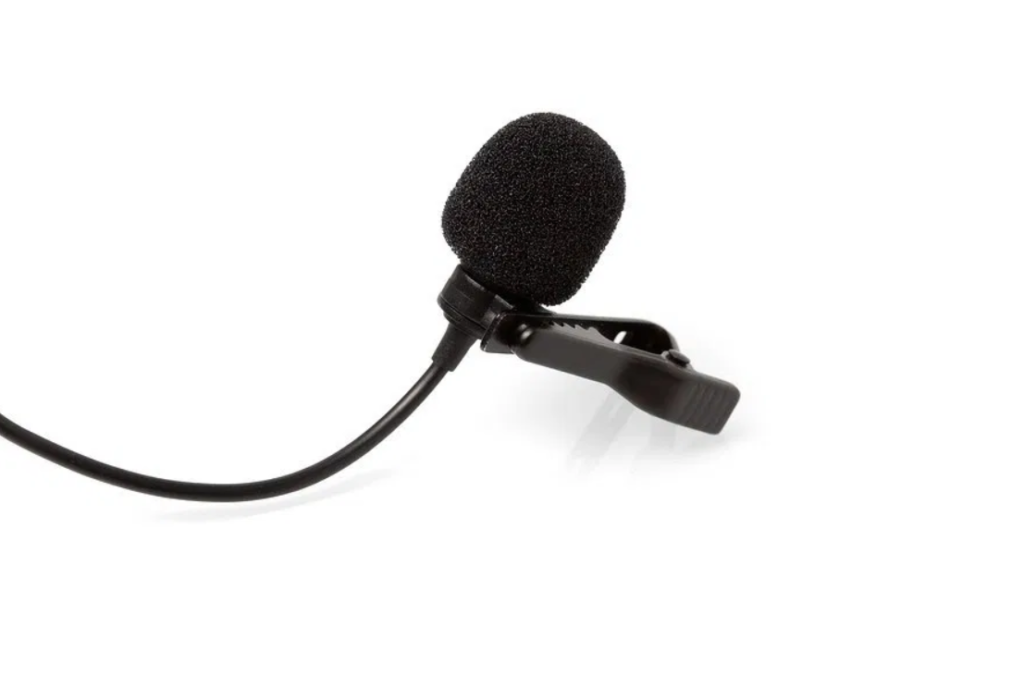
A lavalier microphone, also called a lav mic or a lapel mic, is a small and discrete external microphone that can be clipped onto a subject’s clothing.
It’s best used when you need to gather dialogue from one or several specific subjects without getting interference from cross-talking or distracting background chatter.
In videography, lav mics help capture crisp audio and are perfect for broadcast shooting when there are one or more presenters, in video interviews, or if you’re a solo presenter for a vlog or YouTube tutorial.

How does a lavalier microphone work?
Lav mics convert acoustic energy into electrical energy in the same way that your mobile phone microphone does.
Lav mics are usually omnidirectional, meaning they pick up sounds from many directions. But when positioned close to the subject’s mouth, a lav mic produces sharp, clear, and uniform sounds without the background noise.

Lav mics usually come either as wired or wireless mics. A wired mic comes with a thin cable you usually attach directly to the recording device, such as a camera, computer, or phone.
While they’re more affordable, wired lav mics also restrict movement so they’re best used for front-of-camera vlogging and other sedentary situations.
A wireless mic has a more complicated setup but gives you complete freedom to move during filming. In a set-up with a wireless mic, you need to run the cable from the mic to a small transmitter pack that’s attached to the subject’s belt or hidden in a pocket. The transmitter then passes the audio to a small receiver, which is plugged into your recording device.
While wireless lav mics guarantee more flexibility, the sound isn’t always as good as what you can get from a wired lav mic, especially if the transmitter picks up outside interference.
How to use a lavalier microphone
Using a lavalier microphone is simple once you get the hang of it.
Step 1: Connect the lav mic to a recording device
You might be plugging your lav mic into a computer or phone, directly into your camera, or into a transmitter, depending on whether the mic is wired or wireless.
If you have a wired mic...
To connect a mic into a smartphone or computer, you can plug the mic straight into your device's headphone port (if it isn't compatible, you might need an adapter). You then select the mic as your audio input and output device and start recording.
To connect a mic into your camera, you’ll need to make sure the camera actually has a mic port (these aren’t always guaranteed!).
If you have a wireless mic...
Wireless mics are trickier to set up since they transmit their audio feeds wirelessly to a receiver. This means you need a transmitter pack and a receiver as well as the lav mic.
The transmitter pack stays on the subject's person and plugs directly into the mic to transmit audio. This device converts the audio into a signal it can send through a radio frequency to a receiver, which is, in turn, plugged into the recording device for recording.
Step 2: Mount the lav mic on the subject
Lav mics come with alligator clips that can be attached to the subject’s clothing. You’ll get the best audio quality when you attach the mic within 20-30cm of the subject’s mouth.
Usually, the best position is around the neckline or sternum, such as on a collar. But you’ll need to make sure the mic doesn’t rub against clothing.
How to hide a lavalier microphone
If you want to keep your video slick, you’ll want to hide the microphone as much as possible. A few ways to obscure the mic include:

- Clipping it to an undergarment with an additional light layer on top (but you’ll need to be careful that it doesn’t rub against the fabric and create distracting sounds).
- Taping the mic to the inside of a shirt or attaching it to your skin with medical tape.
- Pinning it to the button area of a dress shirt.
- Clipping it behind the knot of a tie.
- Tucking the mic under a helmet.
- Attaching the mic to the underside of a shirt collar.
Don’t forget the cable! The most common way to hide the cable is to thread it underneath a subject’s clothes.
Step 3: Manage the cables
Whether you have a wired or wireless mic, you’ll be dealing with cables. Most importantly, you’ll need to make sure the mic cable doesn’t snag or pull on the mic and create vibrational noise.
There are a few ways to take the tension out of a mic cable. The first and easiest is to make sure the cable is never stretched taut.
Another way to avoid cable snagging is to use tape or cable management clips to keep it in place. Alternatively, you can simply tie the cable in a loose knot with plenty of give.
Step 4: Sync the audio to the camera
If your microphone isn’t directly connected to the camera or recording device, you’ll need to sync up the separate audio and video recordings in post-production.
It’s best to use a production slate or your hands to make a loud clapping noise close to the mic (and visible in the video recording). These simple cues make it easy to sync up the audio with video.
And that’s it! Once you’ve teed up the audio and video and made any further edits or changes, your video is ready to put out in the world.
Need to buy or upgrade your microphone?
At Camera House, we have a huge selection of external microphones, including lavalier mics. Shop our range online today or learn more about the difference between lavalier mics and shotgun mics.
