With drone photography clearly becoming the future traveller’s camera of choice, it’s going to be harder to get your photography to stand apart from the crowd.
Learning to fly a drone AND take impressive shots is no easy feat. So in this article, we’ve brought together some of our best drone photography tips and techniques to help you get better aerial photos.
12 handy tips to help you achieve better drone photography
1. Learn to fly before you learn to shoot
Drone photography demands two skills. Alongside capturing incredible aerial shots, you also need to know how to fly your drone.
Before you jump into the photography aspect, it’s a good idea to get familiar with flying your drone. Find an open space and practise all the different controls. Once flying your drone becomes second-nature, you can start concentrating on the photography side.
2. Check the UAV forecast
The UAV forecast monitors the weather and delivers important information that will guarantee the safety of your aircraft - and yourself!
A UAV forecast can tell you what the weather will be like for shooting day. It will also let you know how many GPS satellites are active in the area, and it will inform you of off-limit zones for flying.
It’s always critical to know the weather conditions before you fly your drone. Rain and moisture can destroy a battery while heavy winds can ruin your aircraft. Checking the stats on a website like UAV Forecast is a good idea.
3. Shoot in RAW format
As with any photography, shooting in RAW format gives you much more control over your edits in a post-processing program like Lightroom. These days, most high-end drones have onboard cameras with RAW format capabilities.
RAW files preserve more detail and resolution in your photos and contain more levels of brightness, which means you can make greater adjustments to colour and exposure.
4. Envision your shots before you fly

Most drones come with, at most, 30 minutes of flight time, meaning you’ve got just half an hour (max) to line up the shot you want.
A great way to optimise that flight time is to picture the shots you want to achieve before you’ve even sent your drone into the air. It will take a while to learn how to read the scene from the ground, but once you do, you’ll become extra efficient with your flight time.
5. Use that thirds grid
We’ve talked many times about the importance of composition in photos. It’s hard enough getting the right composition on the ground - imagine trying to do it from up high in a short time frame.
Most drone cameras have a thirds grid overlay (in the accompanying app) that can help you frame more impacting photos faster so you devote more time to actually capturing the shots.
6. Keep your ISO low
Drone cameras have pretty small sensors so high ISO settings can produce noise and grain in your shots. It’s best to set your camera settings manually to keep your images exposed with the lowest possible ISO.
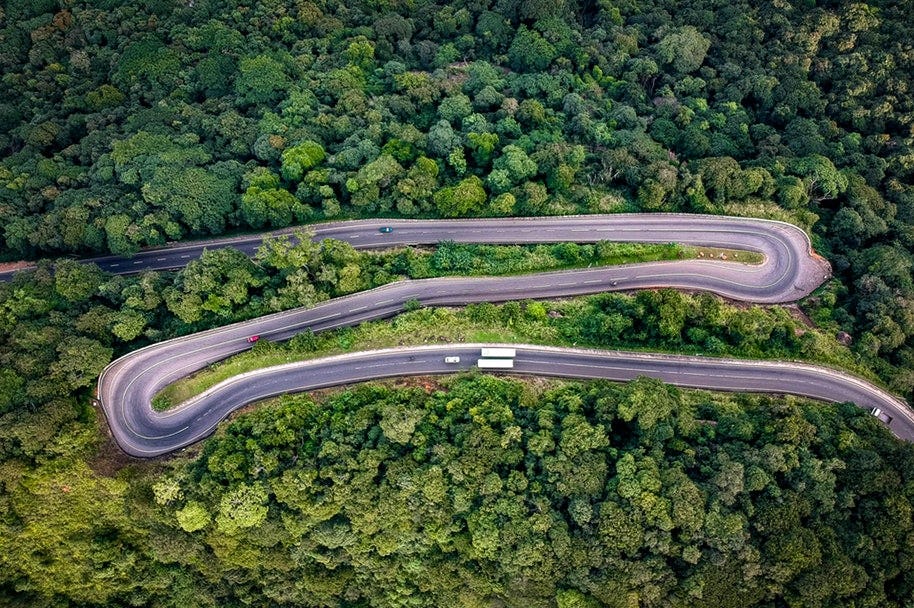
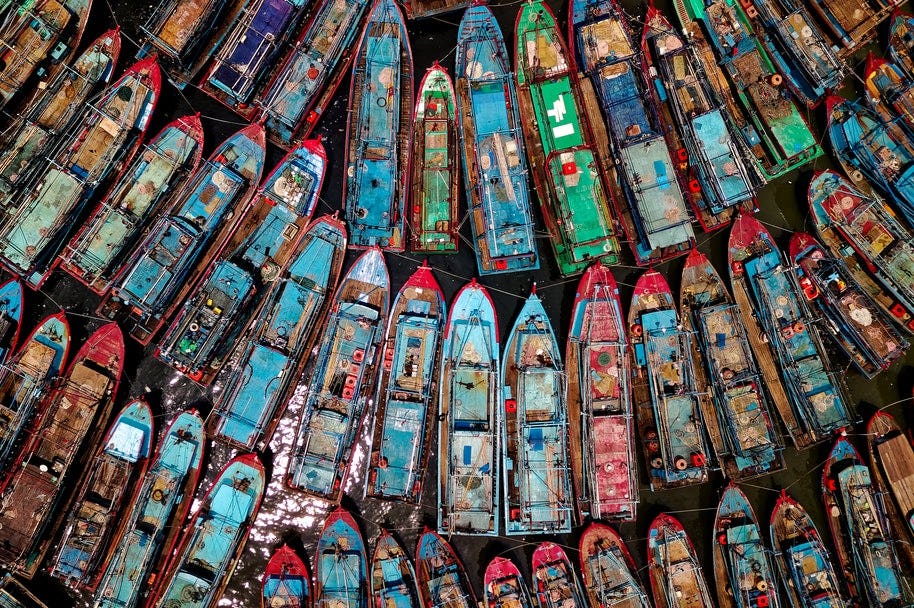
7. Look for visually captivating elements
It’s a whole different ball game when you’re shooting aerial photos. The bird’s eye perspective gives you a unique edge in your images. From above, you’ll find original patterns and lines not otherwise visible from ground level.
These elements will help you compose your shots - not an easy task when you’re shooting from above. Look out for hypnotic patterns, symmetry, or dividing lines, such as a road.
8. Use Auto Exposure Bracketing
If your drone comes with Auto Exposure Bracketing (AEB), it’s well worth giving it a go. This feature lets you shoot the same photo multiple times at different exposures so you can create the perfectly exposed shot.
9. Use a lens filter
Lens filters on your drone camera can transform your shots by suppressing reflection and glare, enhancing colours, and helping you better control lighting.
The type of filter you’ll need depends on your own photography habits, such as when you shoot, or what. A polarising filter will help the colours pop in your images, while ND filters reduce light and glare.
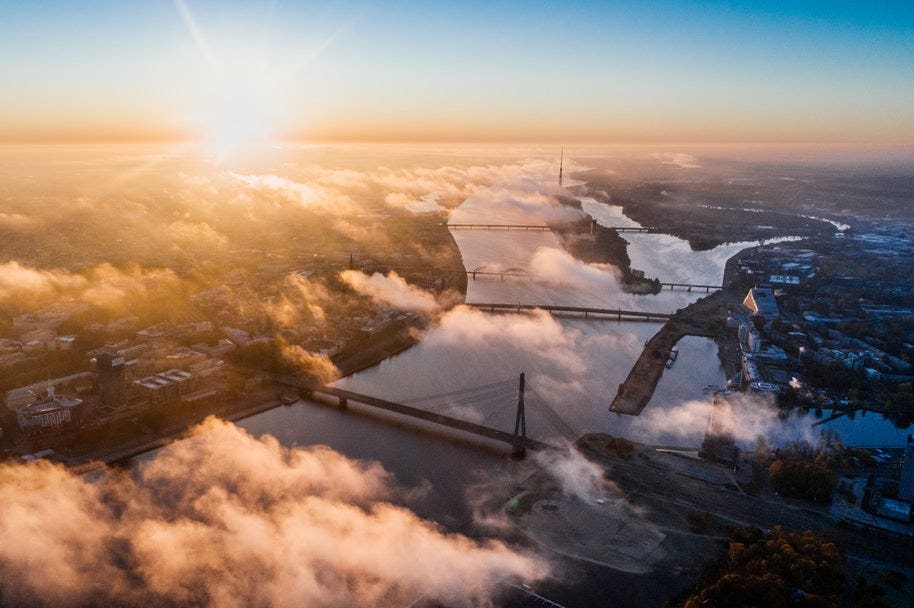
10. Play with shadows
Sunrise and sunset are great times to shoot from the ground - but they're equally impressive from the air, when shadows stretch out across the land. Shadows can add drama to your shots or they can tell a story of the subject’s movement.
11. Perfect those angle shots
It might be tempting in the beginning to capture bird’s eye views, but that will get old quickly. Angled photos aren’t easy to capture (you need to get the height and distance just right), but they’re a good way to help you isolate your subject while adding just a little extra height to the frame.
12. Bring spare batteries
This doesn’t have as much to do with photography skills as it does common sense. Thirty minutes of flight time is the maximum time allowance you have for capturing epic shots - unless you have spare batteries with you.
If you plan on filming a full day’s adventures, spare batteries are a must. For long hikes and overnight camping trips, those spare batteries will help you explore the land from the sky and capture more photographs - in the end, helping you produce more amazing images.
Want to become a pro drone photographer? Learn about more drone accessories that will completely transform your experience today.