Getting panoramic pictures just right means you have to get your location, camera position and image exposure just right. It can be a tricky task, which makes automatic panoramic modes a godsend on modern cameras and smartphones.
But you still don’t have total control over the final image. If you really want to impress, there are a few tips and tricks you need to know to create a standout wide angle photograph.
Find a worthy subject
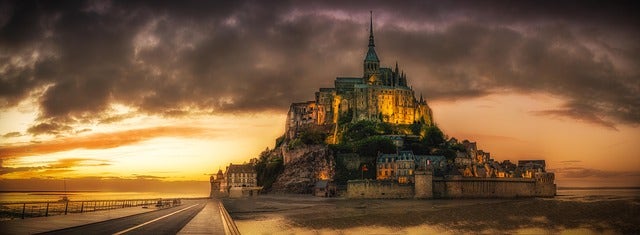
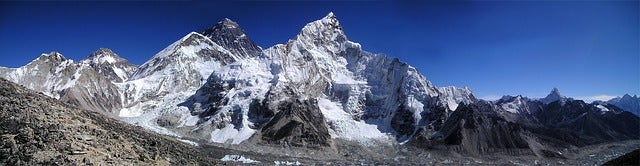
Fun fact: panoramic is Greek for “all sight”. And that’s kind of the point: you want to be able to stitch together a composition of photos to create a single wide format photo that will portray a vast landscape or object.
That means you want to find an expansive, overwhelming subject. It could be a horizontal image of a canyon or a mountain range, or a vertical panorama of a skyscraper or waterfall.
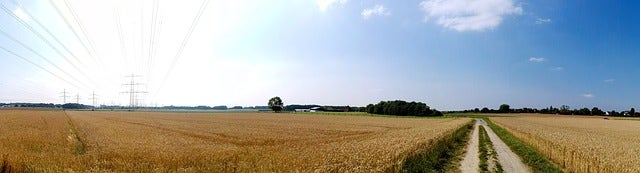
The right panorama should give a clear, sweeping image of a scene. It’s best to avoid objects such as trees or shrubs in the foreground. Part of finding a worthy subject is finding the ideal position and time. As always, the Golden Rule is to consider the Golden Hour – those times around sunrise and sunset. And a popular position to photograph from is typically an elevated area so you’re avoiding those foreground objects.
Avoid moving objects
Trees swaying in the wind may look nice at the location, but moving objects can spoil your panoramic image. For a start, they can be hard to stitch together if you’re not using an automatic panorama mode.
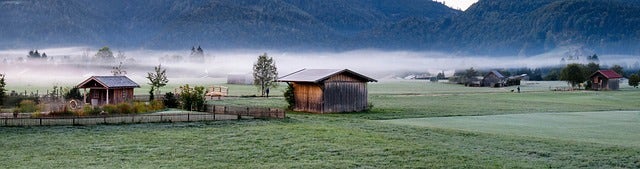
In ordinary images, moving objects, such as water, cars, people or grass, can bring life to your photo. But that’s not so with panoramas. If you have moving images, you have to take the sequence of shots very quickly, which isn’t ideal for this scenario.
If you must shoot in windy conditions, try to have the wind moving everything one way for more consistency.
Put your camera in portrait orientation
This is a hack that could blow your mind. Most people think that with panoramas, you must hold your camera horizontally – in landscape mode. While it sounds natural to do this, you’re actually jeopardising your picture’s resolution.
Vertical shots on the other hand enable you to capture more of the sky and ground so you can introduce greater context and detail into the image. You’ll also take higher resolution photographs.
Secure the camera
Once you’ve picked your scene and the ideal time of day, it’s time to set up for the shot. Many photographers swear by a tripod, and when it comes to panoramas, this is a time when you could really benefit from the stability tripods provide.
If you do use a tripod, make sure it’s totally level and securely locked into place. Before you start taking shots, be sure you can pan the camera from side to side without changing the angle of the image.
If you don’t have a tripod, though, it’s not the be-all-and-end-all of your panorama. Many quality panoramas have been taken in a hand-held position, by keeping your elbows close to your body, rotating just your upper abdomen, holding the camera close to your eye and using the viewfinder instead of the LCD display.
Lock focus
If you’re taking multiple pictures to combine them into a panorama, make sure you lock or manually focus your camera to ensure exposure doesn’t change as you go from one image to next.
If you don't, you’ll get what’s known as "banding”, which is where different exposure values (darker and lighter) show like slices throughout the components of a stitched panorama. Consistency is imperative to avoid bright and dark spots but also for focus. You don’t want different levels of focus in the one photo so set your lens to manual focus if you have that ability.
Setting your camera to Aperture Priority mode and the f-stop setting to f/11 or f/13 will enable maximum depth of field, and checking the viewfinder to note the shutter speed will help a properly exposed picture. Basically, abide by the panorama golden rule of keeping the settings the same for each shot.
Overlap each photo
To stitch multiple images together, you’ll have to create overlap by a certain margin so that alignment points are identified. These serve as flags for the software to seamlessly merge the images (to negate what’s known as flaring) and helps you avoid leaving out part of a scene. The margin is a matter of opinion but anywhere from 20-50% should work.
Just remember roughly where the right edge of the first image is then move your camera and line that point up. Take the next photo and repeat. A tripod handle allows you to smoothly move to the next part of scene.
Overlapping is one of the most important aspects of panoramas. Just one slip with not enough overlap can ruin the grandest of shots. If you’re a pro shoot in RAW format – ability to really get most out of each file. But if you’re not a pro, never fear. A lot of cameras now simplify the whole process to make it dead easy for you.
Equipment
Here we provide a quick checklist for what you’ll need to become a panorama expert!
- Digital camera – DSLRs work perfectly because they allow you lock focus or go manual, as well as taking high-quality pictures.
- Lenses – a wide zoom lens will aid you immensely, something like an 18-55mm for simple purposes or 24-70mm f/2.8G for a better result or an 18-200mm as a versatile option.
- Tripod – optional but highly recommended since it improves consistency so much.
Looking for the ideal panoramic camera? Feel free to pop in store for helpful advice before you commit. Or browse through our full product range today to find just what you’re looking for.