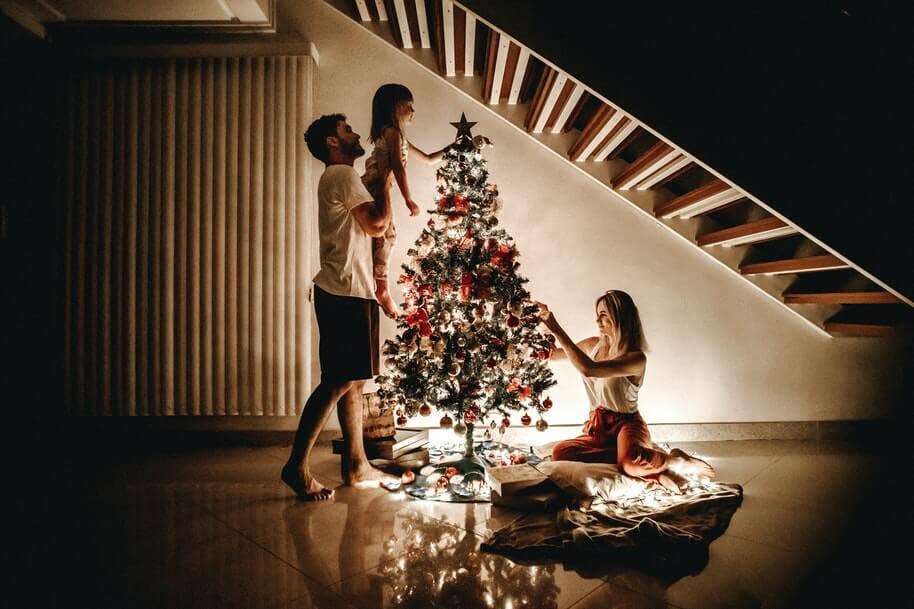
With their magical lights, Christmas trees are made to be photographed at night. You want those strings of lights to feature as the centrepiece in your photos.
But then you have the trouble of finding the correct settings to help you expose the tree without overexposing the lights or underexposing the surroundings.
Below, we’ve got your sorted not just with some handy tips on the best camera settings for your Christmas tree photography but also with some inspirational creative ideas to help you capture dynamic shots.
Avoid the flash
Your on-camera flash will completely ruin the scene, dulling those twinkling lights and creating a garish bright light that does no credit to the festive atmosphere.
If you MUST use a flash, opt for an external flash that helps you light up your scene properly without disrupting the overall effect.
Add more light
Even better, instead of using a flash, create additional light to play off the sparkling tree lights. Having extra lamps or light sources will brighten your shadows and allow you to shoot with a slow shutter speed without having to up your ISO excessively.
Play with the white balance
Chances are you’ll want your Christmas tree photos to have a warm and cosy feel. But indoor lighting often skews your white balance so that it’s that bit too warm.
Auto White Balance should effectively balance out your Christmas photos but if the image is too warm, try switching the White Balance setting to Indoors or Tungsten.
Use a tripod
You’ll probably need a tripod or monopod to stabilise your camera if you want to shoot with a long shutter speed, reduce camera shake, and capture a crisp shot for that dim lighting.
Use a timer or remote shutter
Investing in a tripod is just one step to ensuring you avoid camera shake. You might also want to protect against movement by using a delay timer shutter or a remote shutter.
This means you don’t have to be anywhere near the camera when the shutter opens, reducing any further risk of camera shake.
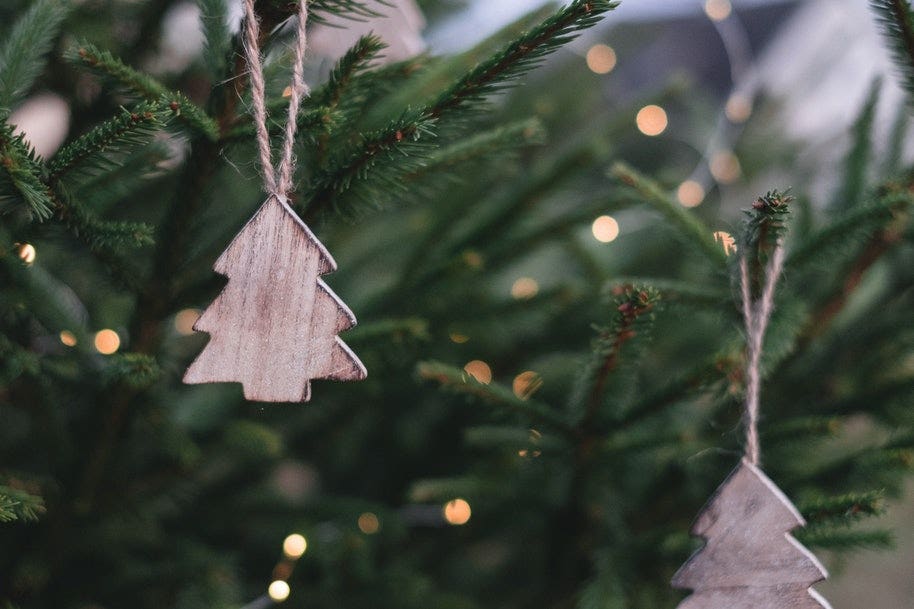
Focus on the tiny details
It’s normal to see wide shots of the Christmas tree in the family album but why not mix up the perspective by getting as close as possible, focusing on a tiny detail such as a handmade decoration?
This style is going to create an interesting angle that might just turn out to be the winning shot for your Christmas cards.
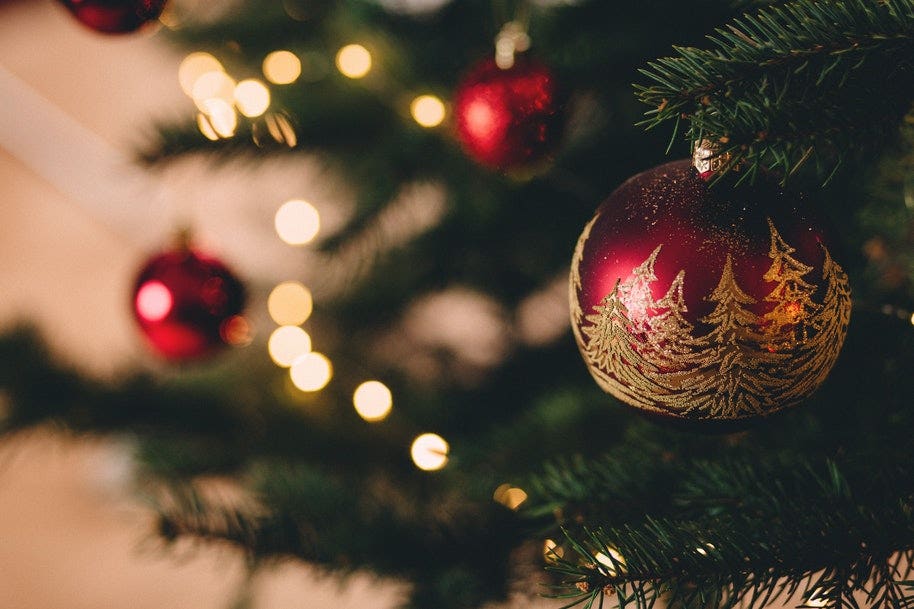
Get creative with bokeh
Christmas time is the perfect time to practise your bokeh. This effect creates luminous but unfocused balls of background light which look festive in portraits with a Christmas tree in the background.
To let in a lot of light and to create a blurry background, your aperture will need to be as wide as possible, which might require a higher ISO. Start your bokeh photography with a setting of about f/2.
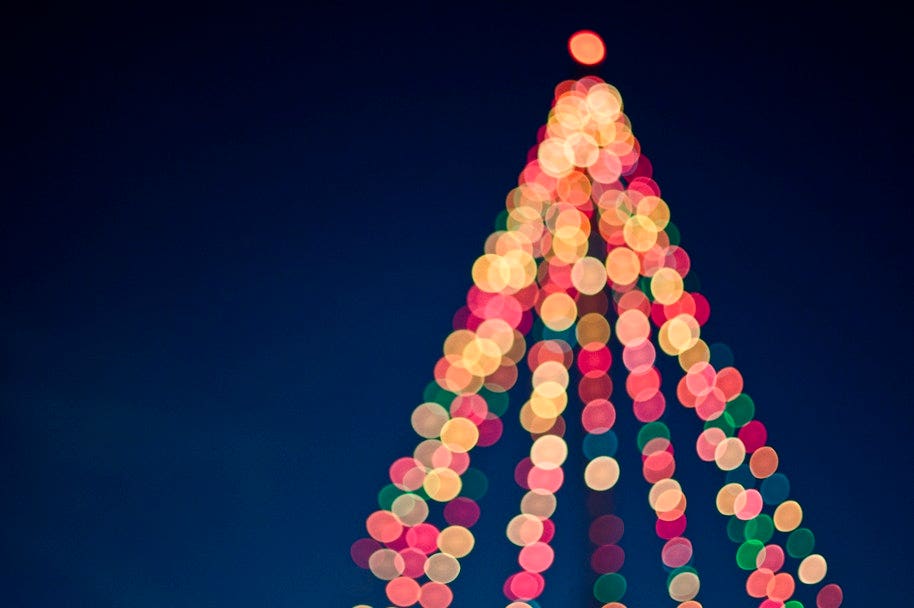
To enlarge the balls of light, create some distance between your subject - a person or an ornament, for example - and the lights.
Create starburst lights
Alternatively, bring your lights into sharp focus to create festive little starbursts.
To do this, you need to spin your aperture the other way, making it as narrow as possible. Try to reach about f/22.
With a narrow aperture, you’ll need a slower shutter speed of about 25 seconds. Your ISO can be low as well to help capture the light in the scene.
The ideal camera settings for Christmas tree lights
If you want to get creative, you’ll need to start experimenting with different camera settings until you’ve found something that works just right for your creative angle.
Ideally, we like to keep the aperture wide, the shutter speed slightly lower, and an average or slightly low ISO to capture the scene without additional light sources.
A good starting point for your camera settings might be an aperture of f/1.4, a shutter speed of 1/200 and an ISO of around 800.
Are you in the festive spirit?
Have you managed to capture some stunning snaps for the Christmas season?
Camera House has a range of photography accessories that will be the perfect stocking fillers or big-ticket presents this year. Browse our online store for inspiration today.