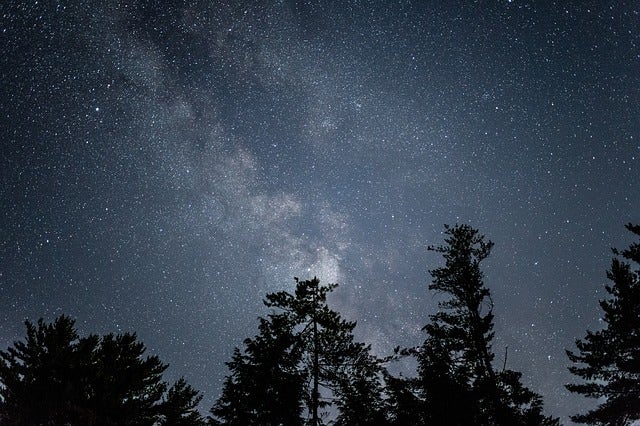
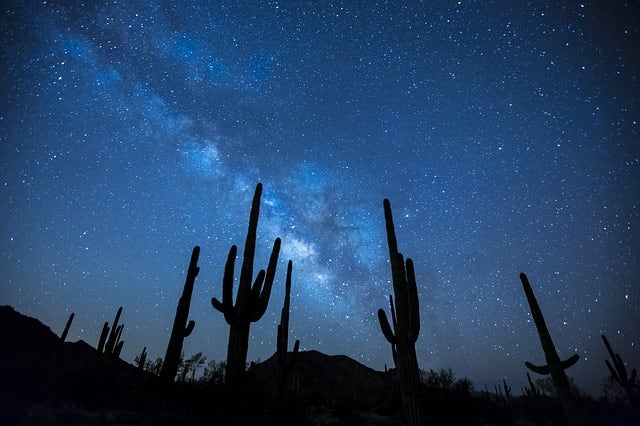
Stargazing is a fun and spectacular way to spend a night. The beauty of the stars can be enthralling; hence why photos of glittering stars and the brilliant Milky Way are so popular.
But taking stunning photographs of the night sky can be a difficult skill to master. There are several things to take into consideration before you get started in night sky photography.
This guide will explain how to photograph stars, and help you master this impressive skill.
What You Will Need:
In order to get the best images of the stars, you’ll need the right equipment. If you’re interested in capturing amazing photographs of the stars, you won’t be able to do it without these essentials.
A full-frame camera
A camera with a full-frame sensor will give you the best results for any low light photography. This is because a full-frame camera will have better ISO capabilities, letting you capture more light in these situations and providing you with better quality RAW files that contain less noise.
A camera with Manual mode
A camera that has manual controls will enable you to fiddle with settings and adjust exposure, aperture and ISO to suit your exact needs.
Wide angle lenses
A wide angle lens gives you lower apertures. Your lens can capture more light and information, boosting the detail and quality of your night shots. You can also try a fish-eye lens to capture more of the night sky.
A sturdy tripod
As with all low-light photography, you will need a tripod to keep your camera stable during long exposures. Without a tripod, your images will come out blurry and you may have unintentional light trails.
Location, Location, Location!
You won’t be able to get stunning photos of stars when you’re surrounded by light pollution. To get the best images of the night sky you’ll want to go somewhere without external lights.
Head out to the country, go to a national park or a deserted beach where street lights and city lights aren’t visible. In these conditions, you might even be able to see the Milky Way.
Camera Settings for Impressive Photos of Stars
When taking photos of stars with a DSLR you’ll need the right camera settings.
Aperture
Often when taking photos of landscapes, using a high aperture will give you the best results because you’ll get the best depth of field. But when photographing stars, you will actually want a lower aperture. Your best bet for capturing the stars in all their glory is f/2.8.
ISO
It can be difficult to find the right ISO for the image you want to capture. Anywhere between 1600 and 3200 will give you the best results, but remember, the higher the ISO, the more noise in your image.
Shutter Speed
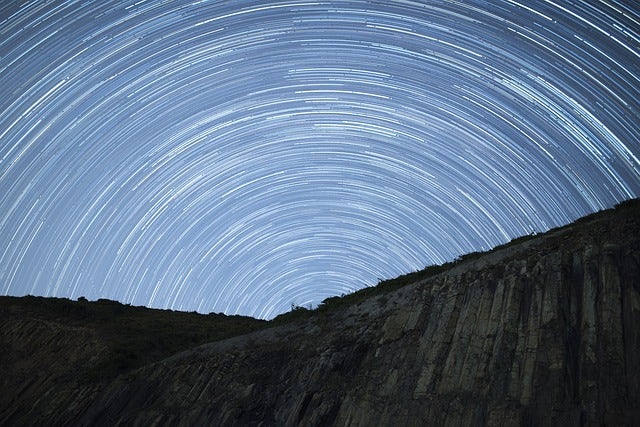
The longer the exposure, the more light your camera can take in, which results in more detail and brighter stars. Thirty seconds is more than enough time to get the perfect photo of stars. Using your tripod is essential here - and you may even benefit from a remote shutter release.
You could even use an even longer shutter speed to capture impressive light trails as the earth rotates and the position of the stars move.
Editing Your Starry Images
Shooting in RAW file format will give you more ability to edit and perfect your images. Once you have your RAW images, you can edit and retouch them to bring out the colour and details.
There are several photo editing programs that can help you make the most of your night sky photography. You can reduce noise and increase the exposure a little more. You can even add pretty tints to your images.
For the best cameras and equipment for photographing a starry night, check out the Camera House online store. Find more handy tips about photography on the Camera House blog today.